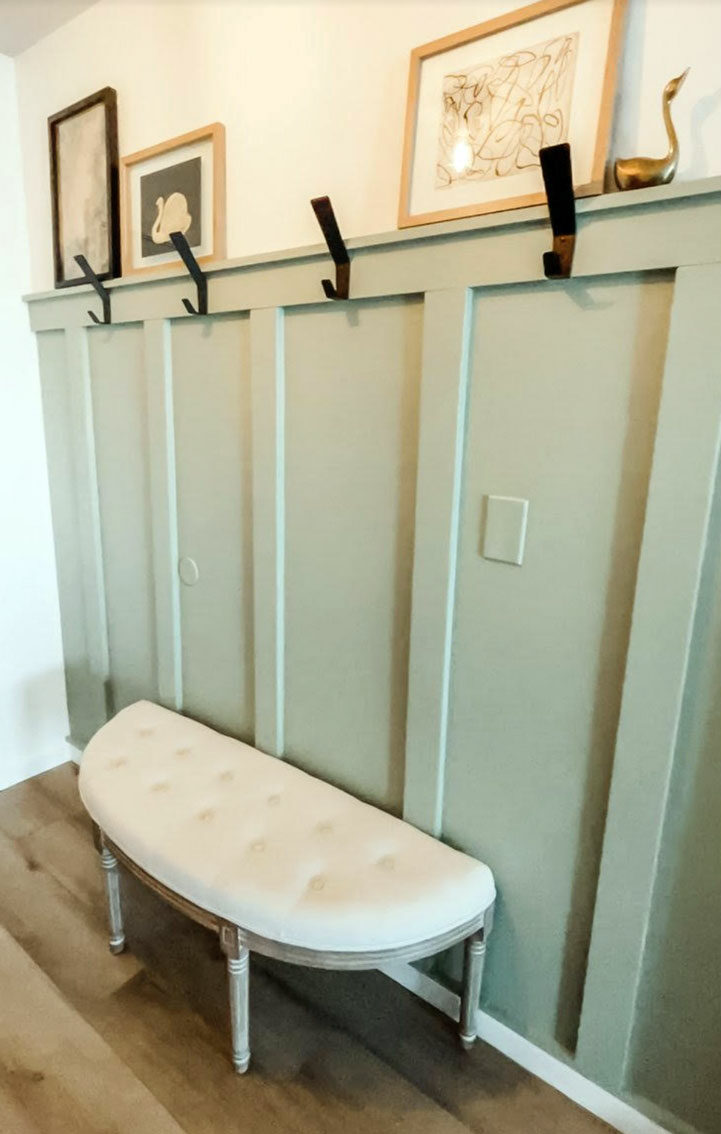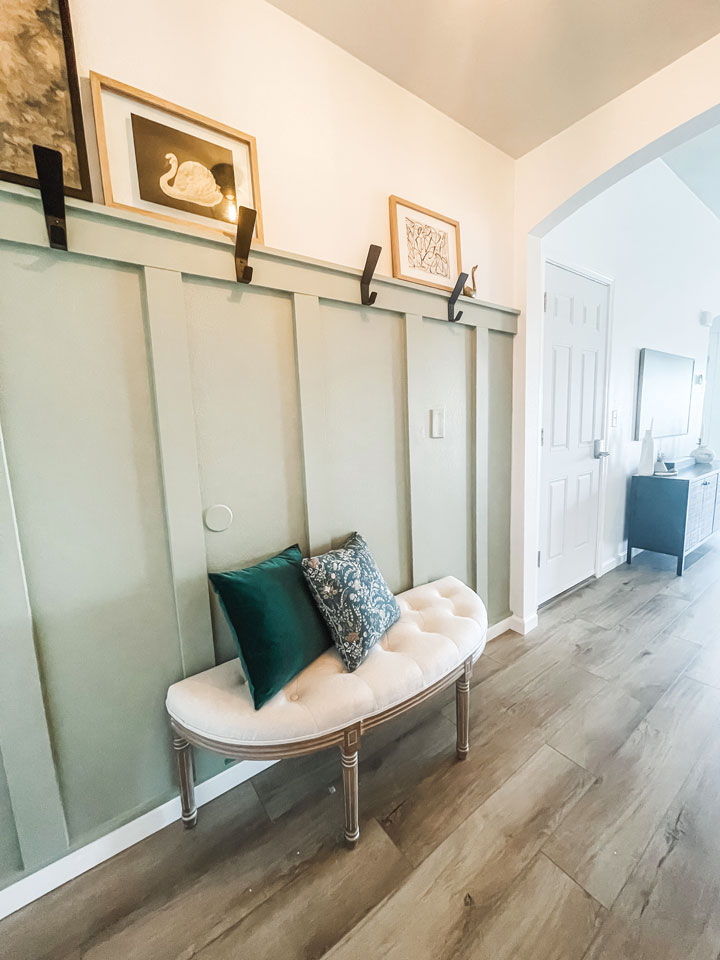
Sprucing up your home’s entryway is a great way to add some character and show off your personal style. Sometimes you can do this with decor, a cute table, plants or some artwork, but I’m going to show you how to take it to the next level with an accent wall.
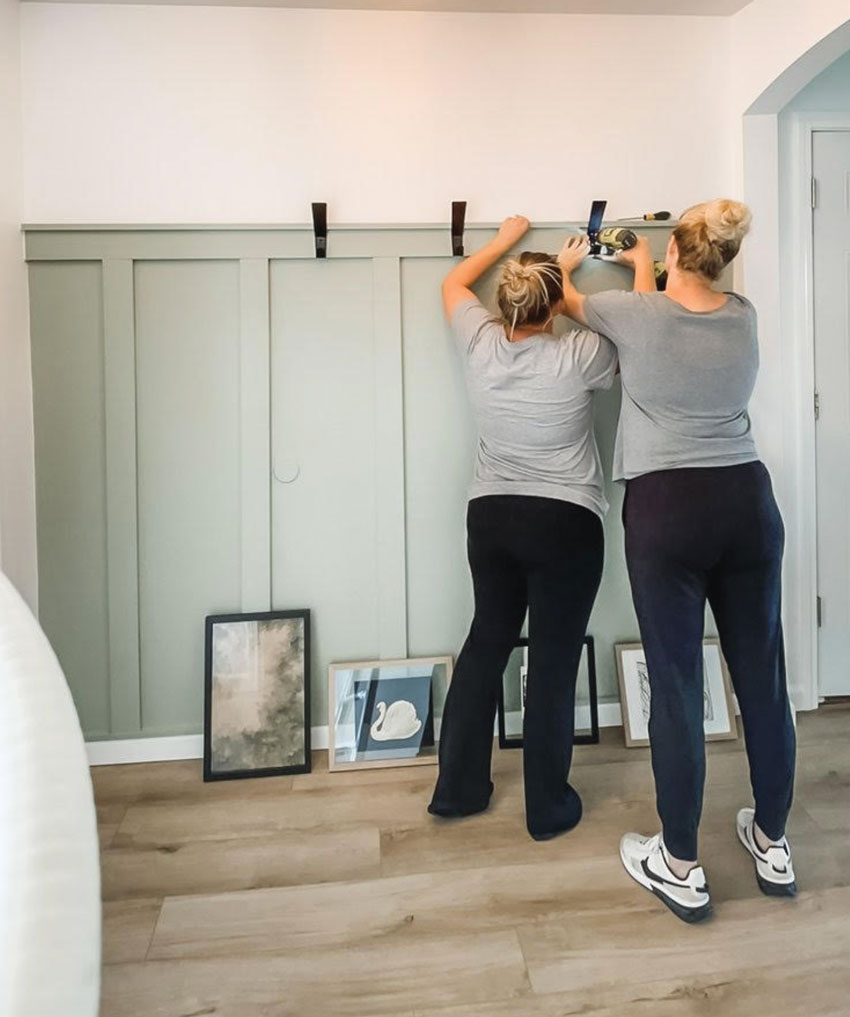
You can customize this to fit your home’s style by changing the design and/or color. My friend and I did her entryway accent wall in just a day, completely transforming her entryway into a beautiful, functional, and welcoming space. Don’t hesitate to get creative with your pattern and color to really make your project pop.

WHAT YOU’LL NEED
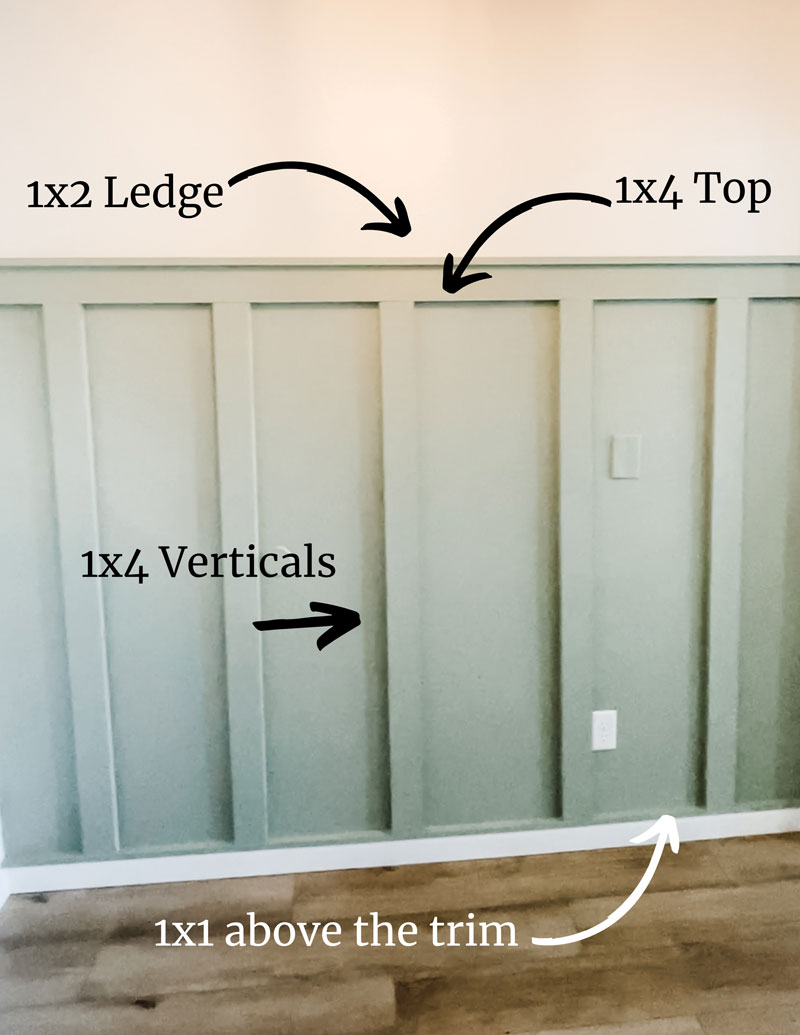
- Lumber (We used 1-by-1s on the very bottom, 1-by-4s for the vertical slats, a 1-by-4 for the top horizontal slat and a 1-by-2 for the ledge.)
- Brad nails (optional)
- Liquid nails (or a similar product, found at your hardware store)
- Caulk
- Spackle
- Paint (we used the color Bay Water by Behr in eggshell finish)
- Paintbrush and roller
- Painters’ tape
- Safety goggles
TOOLS
- Saw (miter, table or jigsaw, or have the hardware store make your cuts)
- Tape measure
- Brad nailer (optional, but this is a low-budget way to attach the slats with minimal damage)
- Speed square
- Level
- Sandpaper or sanding block
- Pencil
STEP 1
Make sure you measure your space before you start. Decide how many vertical slats you want and how tall you want the ledge to sit. Take care to space your verticals around any outlets, making sure they will be equal distance apart. Make a cut list to take to your local hardware store.
 STEP 2
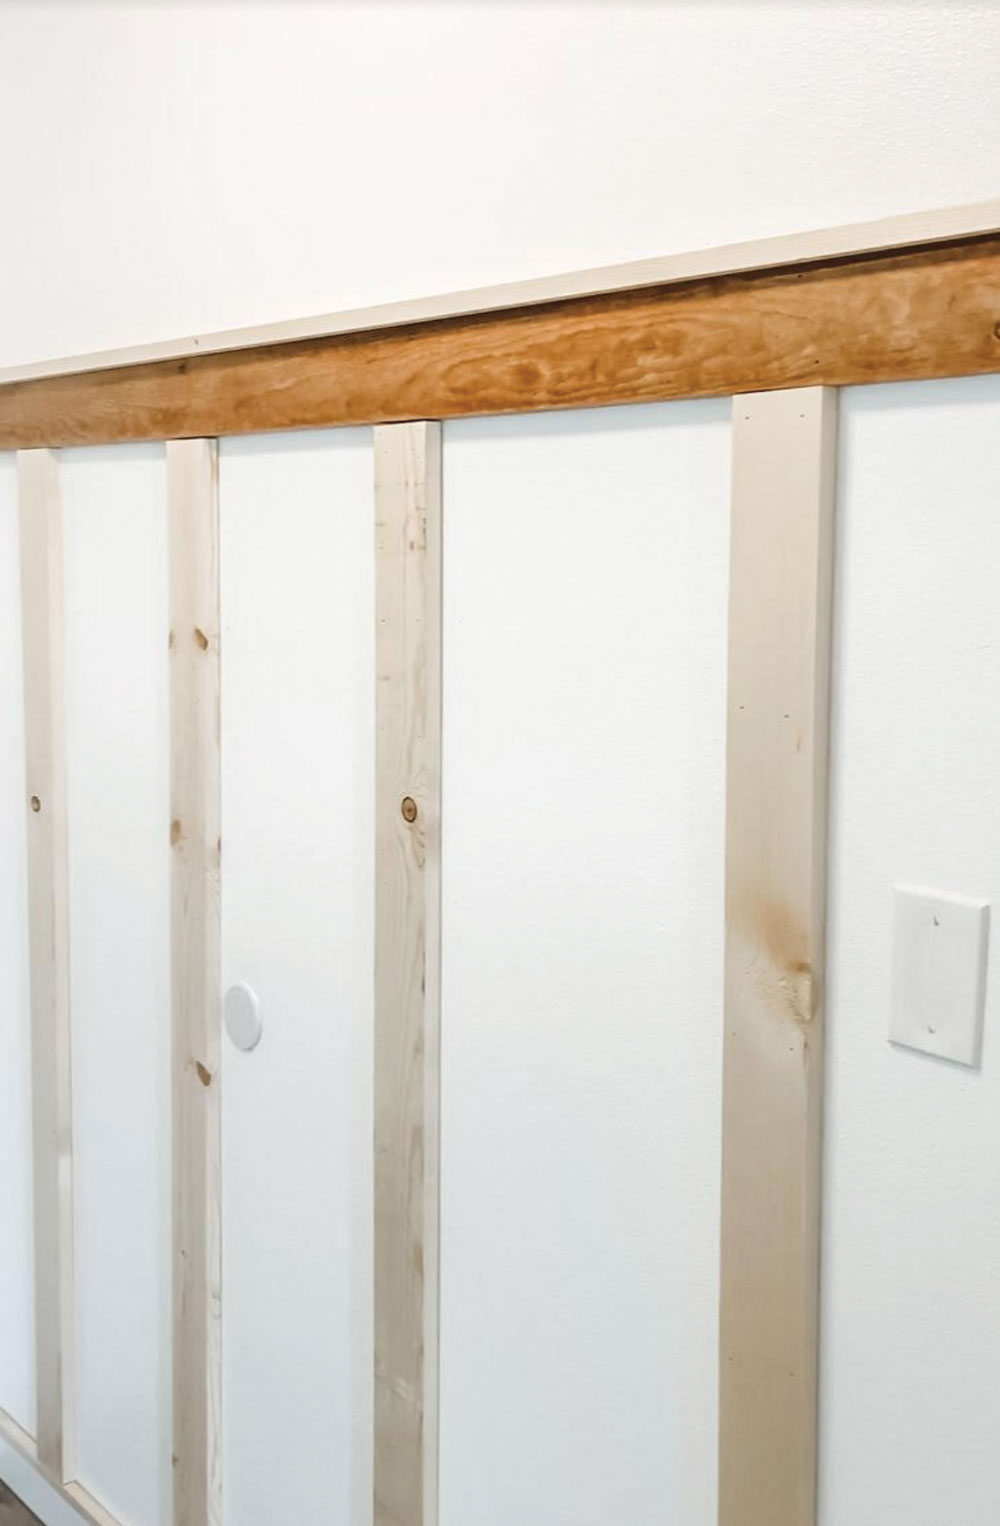
Add a border at the bottom, above the trim. This step is completely optional, but we did this to give the verticals a smooth place to sit. We also knew we didn’t want to paint the trim, so it gave us a nice separation. We used 1-by-1s we found at Home Depot. They were only 4 feet long, so we used three and pieced them together. Make sure to sand the ends for a cleaner finish. We attached the 1-by-1s to the wall with a strip of liquid nails (glue) and brad nails.
STEP 3
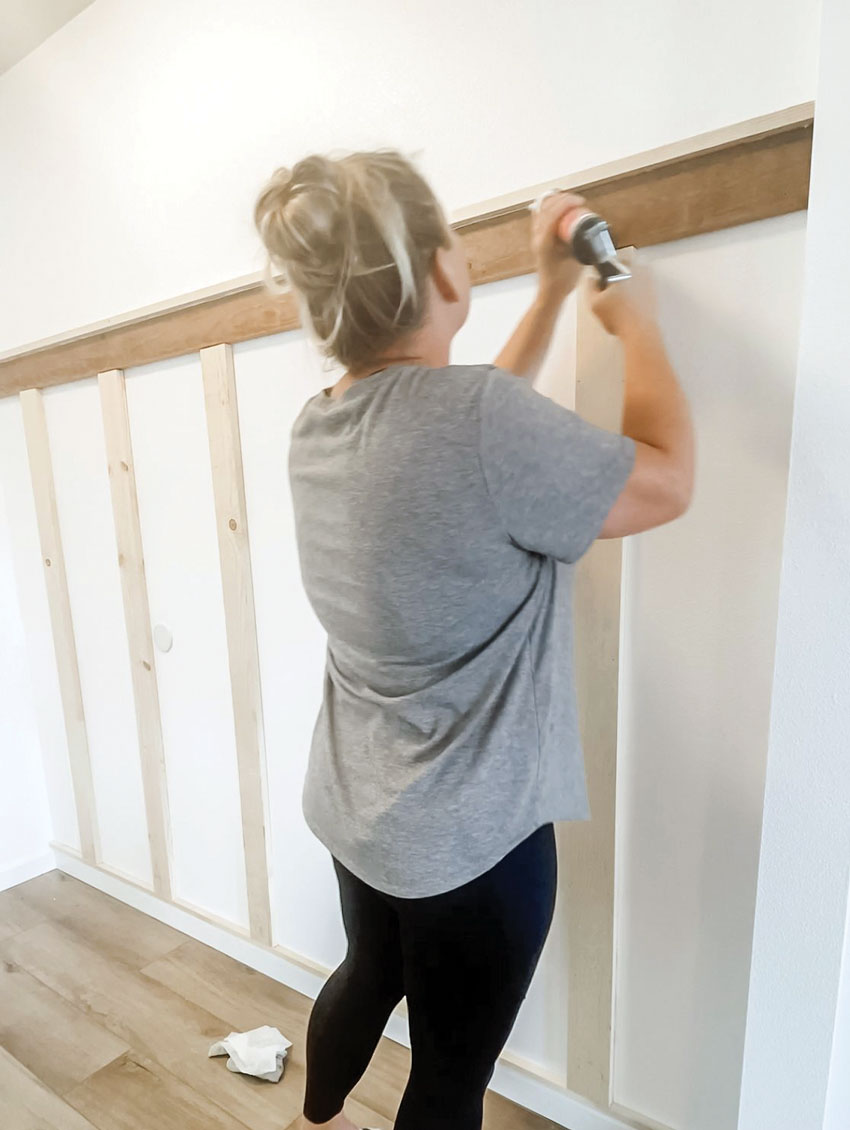
Measure and cut your verticals. Because we used 1-by-1s on the bottom, the 1-by-4s butted up nicely to the bottom. Be precise in your cuts, ensuring that each slat is exactly the same height so that when you go to add your ledge, it sits flush.
Use liquid nails and brad nails to attach the vertical slats. Make sure you’re plumb (level), using your hand leveler or laser level, and spaced evenly. We started in the middle and worked our way out to the sides since we have five vertical slats total.
STEP 4
Measure and cut your horizontal top piece; attach the same way you did before. Measure and cut your ledge. For this piece, we used liquid nails on the wall side and on the top of the horizontal piece, then used the nail gun to attach it to the horizontal 1-by-4 so the nails didn’t go into the wall for this step.
STEP 5
Caulk all your seams and spackle your nail holes. Once that dries, lightly sand the spackle smooth. Dust off your space, and you are ready to paint.
STEP 6
Tape off and paint! Our space only required a quart of paint, and we did two coats.
- *Tip: Using the proper caulk on your seams will help give the project a professional finish. Sometimes changes in weather can cause wood to expand or shrink, cracking the paint. Caulk will help with this in the long run.